
Buying a Walk-In Tub: 5 Mistakes To Avoid At All Costs
August 25, 2018
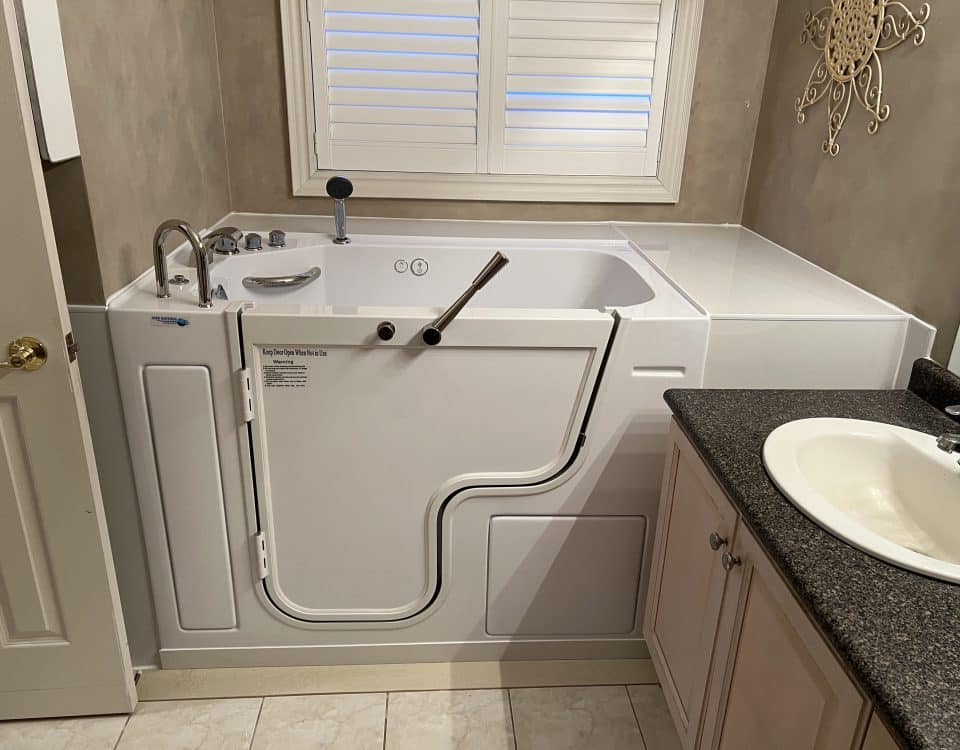
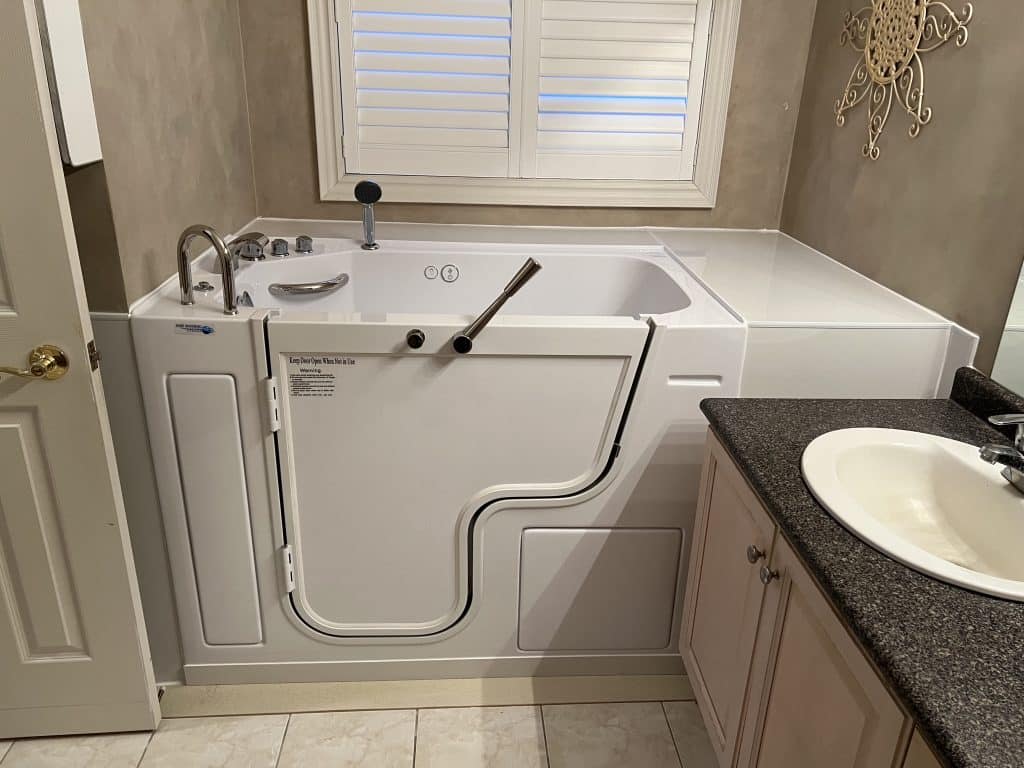
How to Make a Small Bathroom with a Walk-In Tub Look Bigger
October 16, 2018
Bath safety is for everyone. In 2014, 1 in 4 adults reported a fall. And most of the time, it happens in the bathroom.
That’s one of the reasons why almost all of the homes in America have now been fitted with walk-in tubs, This is possible because of the number of benefits they tend to offer.
The ideal walk-in tub must have a design that’s ADA compliant, also, anti-slip flooring, a low step height for entry, and a contoured built-in seating are all important features that must be present.
The traditional bathtubs are dangerous. According to the Center for Disease Control and Prevention, “85% of Americans frequently face serious injuries and hospitalization due to frequent falls that take place while bathing or showering in a tub.”

Apart from meeting the need of bathing daily, walk-in tabs also help in relaxing our muscles especially for the elderly, bathing in a walk-in tub also helps us meditate and relieve our minds from stress.
Other advantages of walk-in tubs are addressing and preventing pain in joints and muscles, helps your body stretch well and lessen the effects of chronic pain issues like fibromyalgia.
Having seen the advantages of using walk-in tubs, it is time to purchase one for your home.
But before you do, I’ll share a few important information you need to know, plus some guidance on how to fit a walk-in tub in small a bathroom.
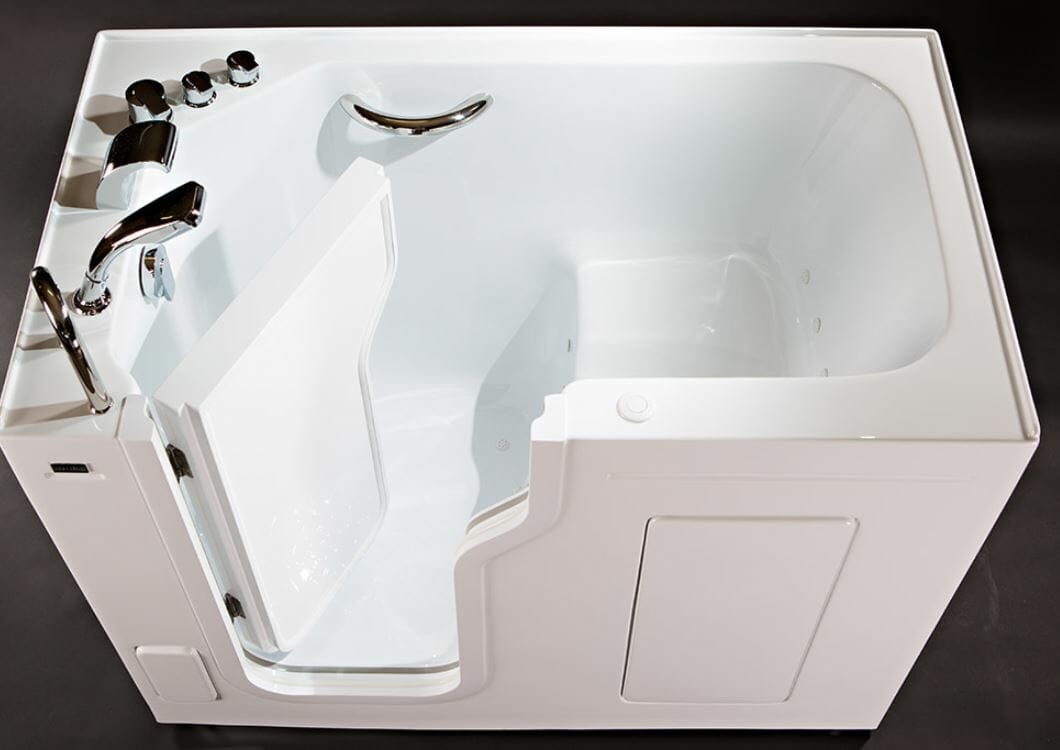
Most walk-in tubs use the glass walls to cover the showering area, most of them give access to the showering area through a water resistant door and frame and some others have a seat positioned in one corner.
Basically, walk-in tubs are modern bathtubs used mostly the same way as the other bathtubs: they are vessels which are filled up with water allowing you to immerse yourself in.
The big difference between the two is that walk-in tubs are fitted with a door in the side for easy entry especially for the elderly. They include most if not all of the safety features the elderly used in the traditional tubs.
These features include:
i). The step-up
A step-up is the distance between the threshold and the tub. Normally, the step-up of a traditional tub is 15-inch which is quite long for the elderly. Walk-in tubs, on the other hand, has an average step-up of 3 to 7 inches.
The walk-in tubs which are wheelchair-accessible have even lower step-ups. An elderly person should not lift his leg so high when getting to or from a bathtub.
ii). The size
.Another breathtaking feature of walk-in tubs is the size. The old traditional bathtubs are estimated to be around a foot deep, on the other hand, walk-in tubs have an average depth of about 2.5 feet.
The increase in depth for the walk-in tubs is to create a spa-like experience for its users. Most of these tubs also are fitted with jets and other designs to help relieve joint pains and soothe muscles.
iii). A watertight door
The other feature which makes the walk-in tubs better in every way is the watertight door used to seal the walk-in tub. You can get a door that swings inwards or outwards depending on the type.
The door gives a tight seal and can be opened even by a school going kid or an elderly since it is not hard to open.
iv). Built-In Chair
When you want to buy a bathtub, there are a lot of things to look out for apart from the size and price, things like comfortability, is the bathtub comfortable? Most of the walk-in tubs are fitted with built-in chairs which allow users to sit.
This feature also minimizes the risk of a fall. As a bonus feature on the same, you have the freedom to adjust the seat.
Another reason why walk-in tubs are most preferred for the elderly is that they have an upscale feature such as massage jets and replaceable hand-controlled shower heads which allow the elders to bathe while in a seated position. In a walk-in tub, you have the option to shower without filling in water all the way up.
This is the best way for the elderly to enjoy all the advantages of a hydrotherapy tub without the need for climbing hence the risk of falling.
Having known some of the features of a modern walk-in tub, here are some of the steps involved in fitting a walk-in tub in a small bathroom:
Install The Ledger Board
The first step involved in fitting a walk-in tub in your bathroom is knowing exactly where the tip of the tub flange is going to hit on the wall studs and leave a mark.
Then, with the help of your four-foot level, extend the mark to each of the studs which the tub flange will rest against. After that, you can move an inch from the mark you made and leave another mark.
Stretch the new mark with the help of your level to all the framing too. Place a 2 by 4 lumber piece to keep the top even to the mark at the bottom. The ledger board is going to the edges of the tub.
Installing The Shoe Fitting
All of the drain lines which were got from the old tubs’ underside and overflow ought to be included in the new walk-in tub now.
One way of doing this is by laying the new unit on its side, in the event where the measurement from the overflow to the drain is different, you may be forced to make some changes which involve replacing the existing pipe with a new one.
However, in most cases, the shoe fitting from the old tub should fit in the new one. It is important to always remember to use a putty liberally for a plumber every time you are doing this installation.
Installing The Mortar
The third step involved in fitting a walk-in tub is installing the mortar.
You first need to mix the mortar, then with the help of a trowel, extend the mortar on the subfloor at the exact spot where the walk-in tub will be put.
The size of the mortar should be about two inches thick. When you finish installing the mortar you can remove the rag which was placed on the drain line while on the prep stage.
Installation Of The Walk-in Tub
Once you finish installing the previously mentioned things, you are now set to put the walk-in tub in its place. Most people do not like this step but it’s a lot easier with help from someone since you will reduce the risk of damaging the tubs or your glass walls.
Lift the walk-in tub and carefully but slowly place it down to its specified area and at the same time make sure that the shoe fittings are in line with the drain lines from underneath.
The edges of the tub should comfortably fit on the ledger boards. After all that you can remove any mortar that you may see along the tub of the exposed edges.
Leveling And Securing The Walk-in Tub
For this step, you can use the four-foot level at the top front of the walk-in tub and place as many wood shims as they are needed to make the unit level from left to right.
After that, you can apply the four-foot level if it can fit or alternatively you can use the torpedo level on an end ledge to make the walk-in tub level from the back to the front.
Once again put in shims as required when the whole unit is level, you can secure it to your wall studs by using a hammer and galvanized nails to pierce right through the tub flange. Other people find it simpler using a bit and a drill to put holes in the flange.
Final thoughts
Once you have completed the steps mentioned above, you will be ready to install your own walk-in tub, from there you can add new faucets or use the ones from the old tub.
Depending on the model of the walk-in tub, you may have the need to place in surround panels.
The panels come with manufacturer’s instructions for installing them to the walk-in tub follow the simple guide and you will have successfully installed a new walk-in tub.
A walk-in tub is suitable for people who have a limited mobility, the elderly in our societies, and people living with conditions like obesity. Make sure to use necessary protective gear.